
Boost Your Website Accessibility & UX with the New navable WordPress Plugin
In the digital world of 2026, website accessibility is no longer just a "nice-to-have" feature or a hidden technical requirement. It is a cornerstone of a superior User Experience (UX) and a powerful driver for SEO. If your website isn't accessible, you are effectively locking out up to 20% of your potential audience.
We are excited to introduce the navable Accessibility Widget for WordPress—the easiest way to start making your site more inclusive today.
Why Accessibility Matters for Your Business
Improving your website accessibility isn't just about social responsibility; it's about growth:
✔ Better UX for Everyone: Features like better contrast or keyboard navigation help not only people with disabilities but also elderly users or someone using a mobile device in bright sunlight.
✔ SEO Benefits: Search engines love clean, structured data. Accessibility improvements often align with SEO best practices, helping you rank higher.
✔ Wider Reach: By removing barriers, you open your doors to millions of users who rely on assistive technologies.
Note: While the navable widget significantly enhances the accessibility and usability of your site, it is a supportive tool and does not provide a 100% guarantee for full legal or regulatory compliance.
Get Started for Free (No Credit Card Required!)
We believe accessibility should be available to everyone. That's why you can start with our Freemium version immediately—no credit card or long-term commitment needed.
Step-by-Step: How to Install the navable Widget
Ready to upgrade your WordPress site? Follow these simple steps:
1. Installation
-
Log in to your WordPress Dashboard.
-
Go to Plugins → Add New.
-
Search for "navable Accessibility Widget" in the plugin directory.
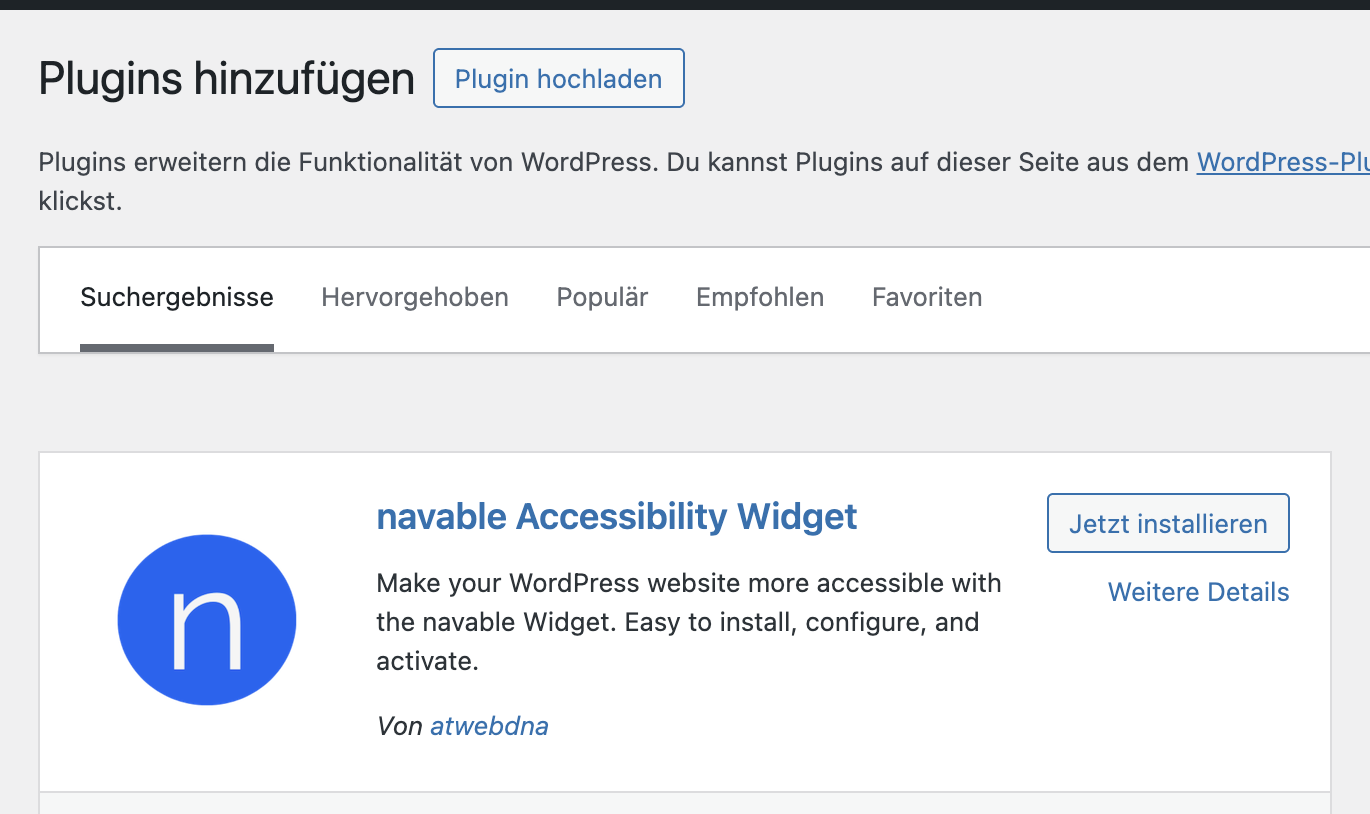
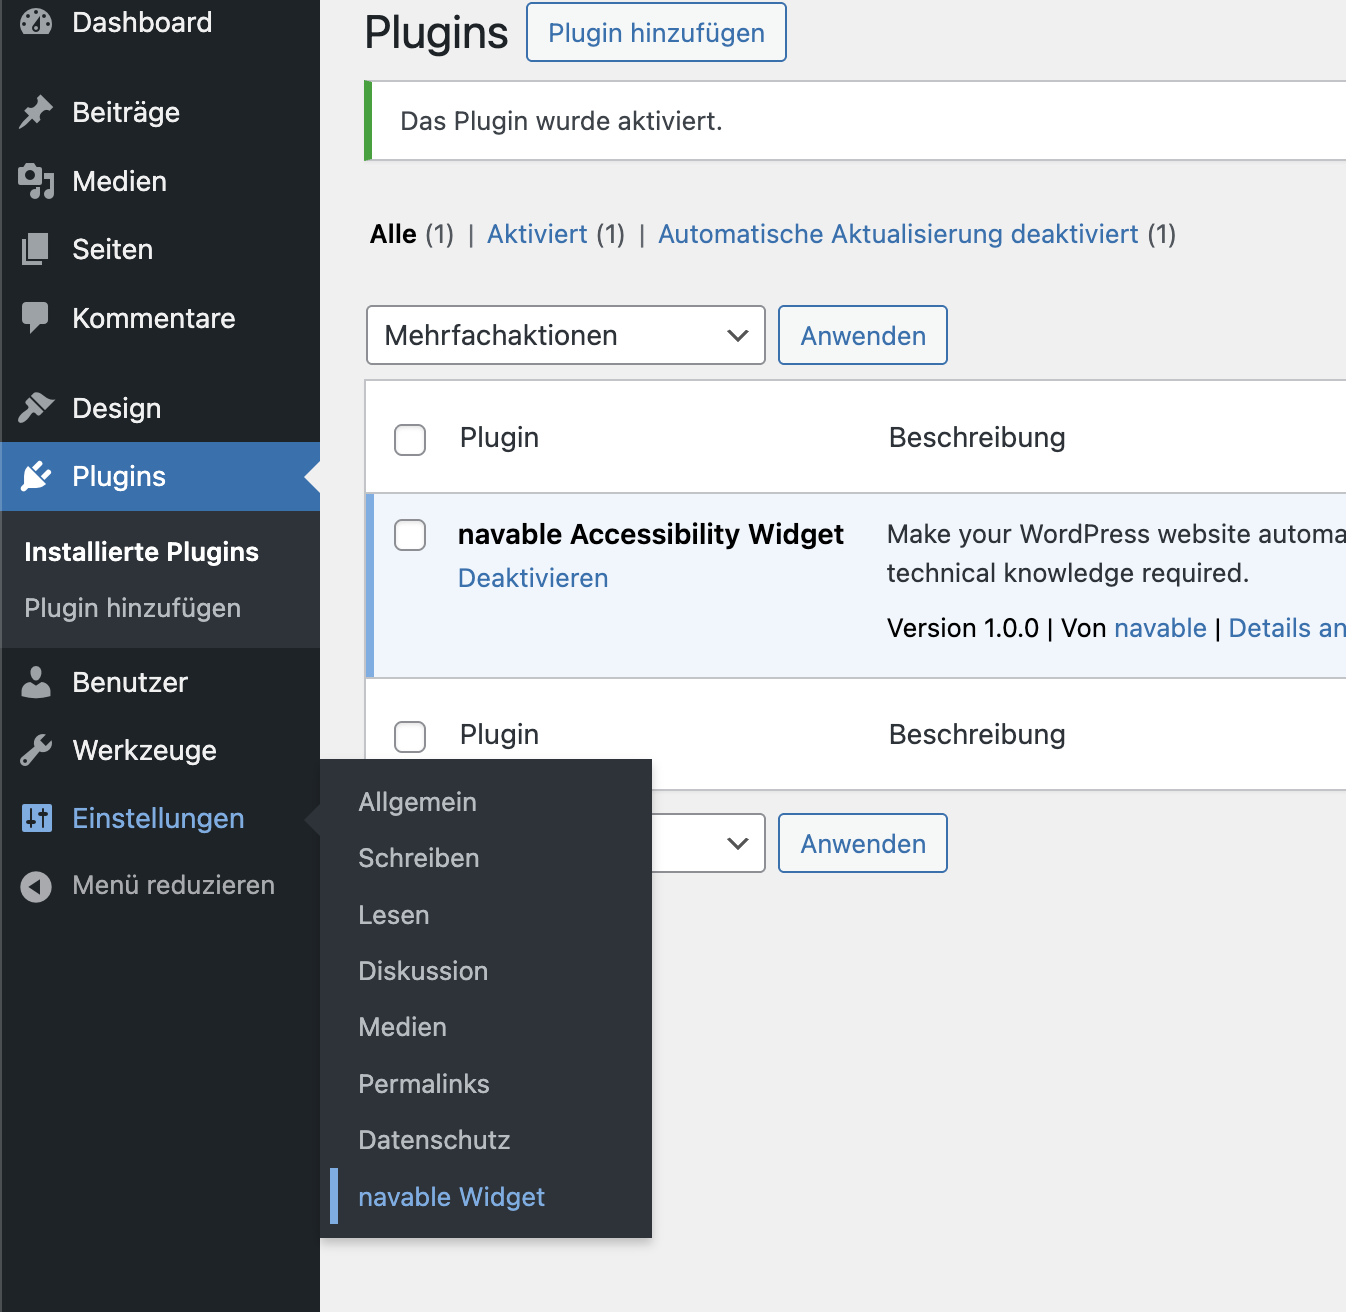
- Click Install Now, then wait a moment and click Activate.
2. Basic Configuration
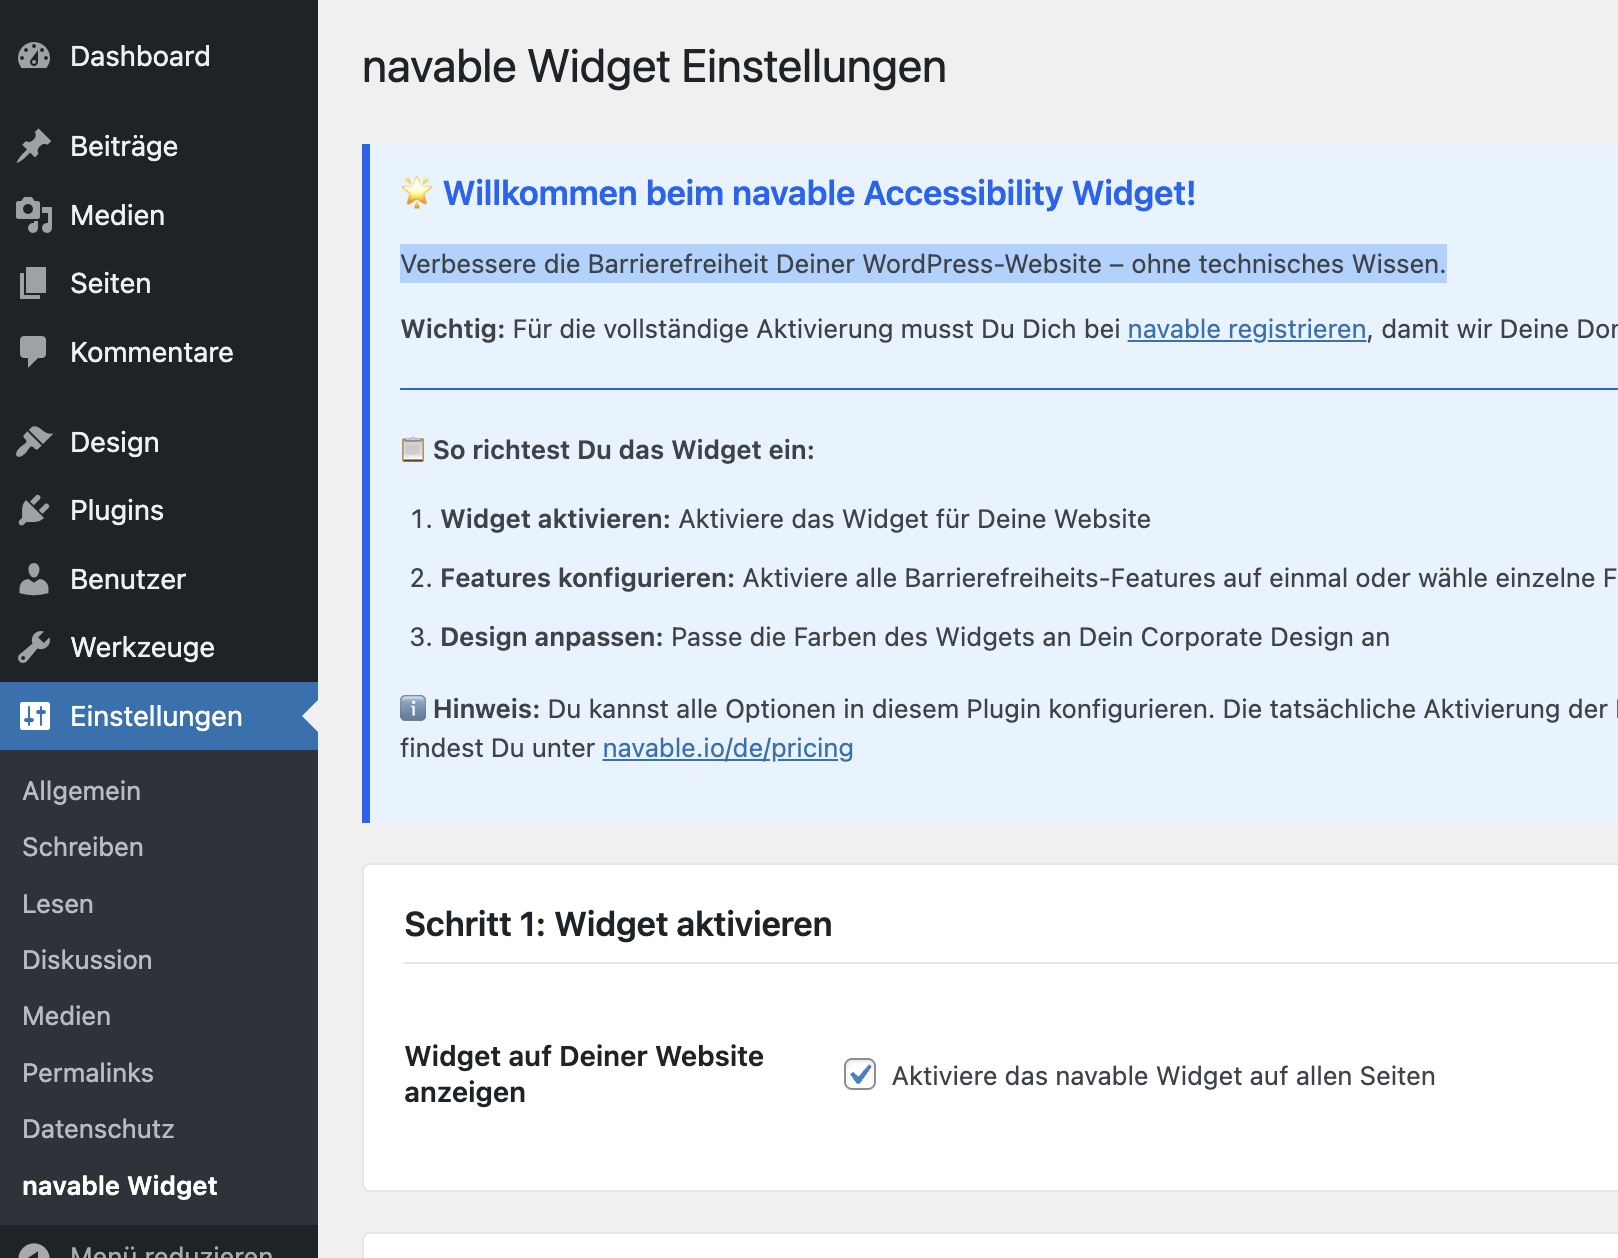
Once activated, navigate to Settings → navable Widget to find the configuration screen.
Step 1: Activate Widget: Check the box "Activate navable Widget on all pages" to ensure the widget appears for your visitors.
Step 2: Configure Features: Depending on your subscription, you can toggle specific enhancements like:
-
Keyboard Navigation: Adds tabindex for interactive elements.
-
Contrast Enhancement: Automatically adjusts text colors for better readability.
-
Label Improvements: Adds ARIA labels to buttons and inputs for screen readers.
Step 3: Custom Design (Pro): If you are a Pro user, you can match the widget to your brand by adjusting theme colors, backgrounds, and text styles.
3. Save & Validate
-
Click Save Settings at the bottom of the page.
-
Crucial Final Step: You must register at navable.io/de/pricing.
-
After onboarding, submit your domain in the navable Dashboard. We need to verify your domain so the widget can be fully activated and served via our API.
📦 Check out the official WordPress Plugin Page
Want to learn more about the navable Accessibility Widget, read user reviews, or see detailed documentation? Visit the official WordPress plugin page:
👉 https://wordpress.org/plugins/navable-accessibility-widget/